
AP-on-a-stick Lives On: A Return Visit to Pinnacle Pines
An Unexpected Call
During the cable installation phase of the indoor AP upgrades, Mike A. called with a mounting question. The Colorado Room — one of the club’s secondary dining areas — has a distinctive four-sided sloped ceiling finished in historical tongue and groove planking. Beautiful to look at. Not so easy to mount an AP on.
The question: could the new AP simply be turned on its side and wall-mounted instead?
My answer was straightforward — the recommended installation orientation for ceiling-mount APs is parallel with the floor, and for good reason. Tilting an AP on its side rotates the antenna radiation patterns in ways that compromise coverage. I suggested an AP mounting bracket to maintain correct orientation, but that idea didn’t land well with Mike or the Technical Committee. A bracket would push the AP down close to head height — not exactly the ambiance you’re going for in a quiet dining room.
So I offered to come back and take a look in person. This is one of the most common tension points in WiFi deployment: the network needs the AP where the RF says it should go, and the client needs it somewhere that doesn’t ruin the aesthetic. Both concerns are valid. The only way to resolve it is to show up with gear and test options.
Back on Site — With the Right Tools
I made a point of bringing a full AP-on-a-Stick kit: tripods, batteries, cables, a Ubiquiti U7 Outdoor Pro AP, and the new NetAlly AirCheck G3 handheld tester. That last item turned out to be essential for measuring 6GHz signals — something the previous G2 couldn’t do. More on why that mattered in a moment.
With Joey and Mike on site, we re-examined the Colorado Room together. The sloped ceiling confirmed what the call had suggested — too difficult to use as a mounting surface. The vertical walls didn’t extend high enough above head height to be useful either. We needed a more creative solution.
Three Coverage Problems Solved
The Colorado Room sits directly between two outdoor gathering decks — one to the west, one to the east. Both decks host member events and needed solid WiFi coverage as part of the Phase II outdoor deployment. Rather than forcing an indoor solution, I proposed something different: place a U7 Outdoor Pro just outside the double door entrance and measure whether it could cover the Colorado Room indoors while also serving both decks.
Here’s where an interesting feature of the new Ubiquiti outdoor APs came into play. These units ship with two external omnidirectional rubber duck dipole antennas that can be mounted to the top of the AP. When you enable external antennas in the UniFi controller, the 2.4 and 5GHz radios bypass the internal semi-directional panel antenna and radiate in a classic omnidirectional donut pattern — ideal for this situation. One important note: the 6GHz radio continues to use the internal panel antenna regardless of this setting, because outdoor 6GHz operation is tightly regulated in the US. Keep that in mind as Phase II outdoor deployments proceed.
With the AP-on-a-Stick positioned just outside the double doors and the AirCheck G3 in hand for spot checks, we found strong indoor coverage — a minimum of -61 dBm across nearly all required areas. The west deck coverage had one wrinkle: the building corner blocked signal to the north end of the deck. By moving the tripod out to the western edge of the deck, we resolved that gap while maintaining -67 dBm or better at all indoor target locations.
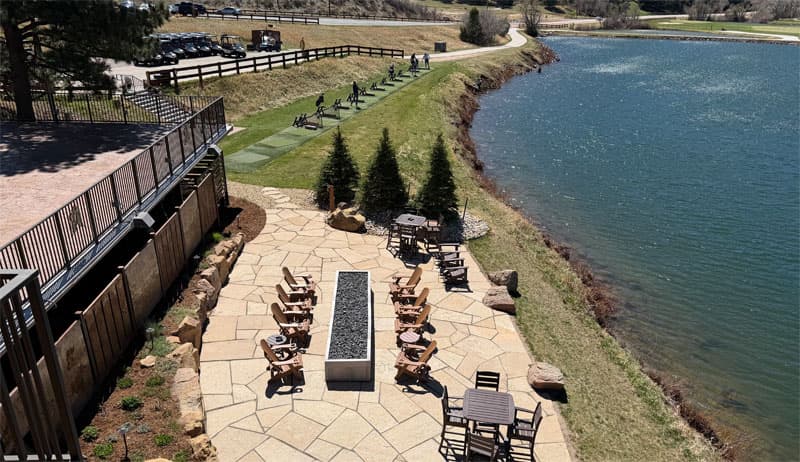
One more area needed checking. Below the west deck, a stairway leads down to the firepit relaxation area and driving range. This ground-level space has two wireless Ring doorbell buttons used to call for beverage service — those need a reliable connection too. A concrete wall on the eastern side of this area creates a partial shadow from the deck-mounted AP. The plan: relocate the existing Rocket AP currently mounted on the south exterior wall of the Club — just above the Pro Shop entrance — and run a new Ethernet cable along the concrete wall to cover the driving range and firepit areas. This makes better use of existing hardware while filling the gap cleanly.
Parking Lot and Light Pole Validation
While we had the AP-on-a-Stick gear set up, we tested a second mounting location on the Club second floor exterior. This AP is intended to serve the upper parking lot and provide a mesh backhaul link to the new parking lot light pole — a custom-fabricated 15-foot steel pole that will carry WiFi cameras and a U7 Outdoor Pro as the intermediate relay in a three-way Phase II mesh stretching south to the Putting Practice area.
The signal from the proposed Club second-floor mount measured -67 dBm at the light pole installation point. That’s a solid mesh link budget with room to spare.
Two Surprises the Predictive Survey Missed
With the kit still set up, we swung inside to spot-check AP006, positioned just outside the main dining hall. For these tests I switched to an indoor AP with internal antennas. That’s when two new requirements surfaced in quick succession.
First: the Chef mentioned he’d like better coverage in his office and throughout the kitchen. This area had been excluded from the initial predictive model because it was assumed WiFi wasn’t needed there. It was a polite assumption — and a wrong one. Lesson learned: always consult every stakeholder directly before finalizing a network design. The kitchen and Chef’s office will need a dedicated AP.
Second: the AP location selected during predictive modeling for the Sales and Marketing office turned out to be blocked by a hidden stone wall concealed behind drywall and wood finishing. This building has history — it was originally constructed during the frontier era as part of a stagecoach stop, and some of those original stone walls are still very much in place, just hidden from view. That wall killed the signal path between the Colorado Room AP and the Sales office. Another AP will be required.
Both discoveries were made because we were on site with a known AP source and a calibrated measurement tool. Neither would have shown up in any predictive model, no matter how carefully the walls were drawn.
The Lesson: AP-on-a-Stick Lives On
There’s a narrative in the WiFi industry that predictive site survey tools have made AP-on-a-Stick surveys obsolete. And to be fair, modern propagation modeling tools are remarkably capable — draw your walls, assign attenuation values, and get a solid heat map design in a fraction of the time a traditional survey would take.
But two things no predictive tool can account for: hidden obstructions with unknown RF absorption characteristics, and actual local noise floor conditions caused by existing WiFi transmitters and non-WiFi radio sources. Both can invalidate a design that looks perfect on paper.
You don’t always need a full passive AP-on-a-Stick survey of every square foot. But a targeted spot check of critical or unusual locations — with a known AP source and a trusted measurement tool — will catch the surprises before the cables are pulled and the APs are mounted.
AP-on-a-Stick lives on. And on this day, it earned its keep.
— Rick Murphy, CWNE #10